
 Alright, so I have recently started this whole bike obsession to help get me through until the next snow season. It all really started when Jess and I started looking into offroad triathalons and adventure racing, where mountian biking is always a big part of those events. So initially I was going to fix up my old 1990’s Specialized Stumpjumper and just upgrade parts until I could afford a new frame. Well, after taking it apart and doing a little price checking, it turns out it is WAY more cost effective just to buy a new baseline bike.
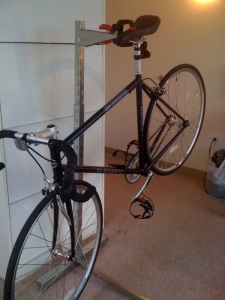
Well, in this endeavour I learned that I definitely need something to get the bike up and stable while I work on it. The whole turn it upside down thing only works for like a flat tire, after that it is a pain having to bend over the whole time while trying to shift with your bars on the ground, ect. ect. Conclusion: Get a bike repair stand. Online shopping time… wait… these things can’t all be over $150!!?? Yep, they sure can.
In typical Ry and Jess fashion when the thing you want is out of budget… make it yourself. So it was time for the DIY bike repair stand. First step (as always) was google. I came across some decent designs and a couple that I wrote down in hopes of copying while going to home depot today. But before going that direction ALWAYS check IKEA. So I went to IKEA, had a 1.99 breakfast and went straight to the warehouse, found the aisle with the garage organizing pieces and started to play. Believe it or not, I found something that looked very promising, so I got it.
1 – BRODER T Foot w/ Braces $18.00
1 – BRODER Extendable 39″ post $6.00
1 – BRODER Bracket $0.99
TOTAL @ IKEA $26.99 (w/ tax)
Next was to go try to find a way to clamp it onto the stand. I went to Lowes and basically bought three different spring and ratcheting clamps to try. The one that ended up working best was the 2″ Ratcheting spring Clamp and one 8-32×1 3/4″ Rnd bolt and nut.
1 – 2″ Ratcheting Hand Clamp $5.99
1 Box 8-32 x 1-3/4″ Bolt/Nut $4.97 (only used 1 of them, but only found the box)
TOTAL @ LOWES $11.83 (w/ tax)
TOTAL FOR ALL: $38.82 (W/ a ton of extra bolts and nuts)
Assembly: 


